Machine learning on Airtable without a line of code
Tommi Holmgren
CPO
June 24, 2021 • 3 min read
AirTable has been all the rave for a while now. It's like Excel on steroids and high in the clouds. That didn't sound a good way to start a blog, eh! :P
I wanted to show how simple it is to add machine learning capabilities to your AirTable, with a few simple steps that require no coding. I chose to do this step-by-step guide with the purchase invoice GL-code prediction use case. The one that we are soon exhausted to the end (there are many more blogs). It is challenging to find a good dataset that is public. This one works!
So jump in and imagine this is your situation:
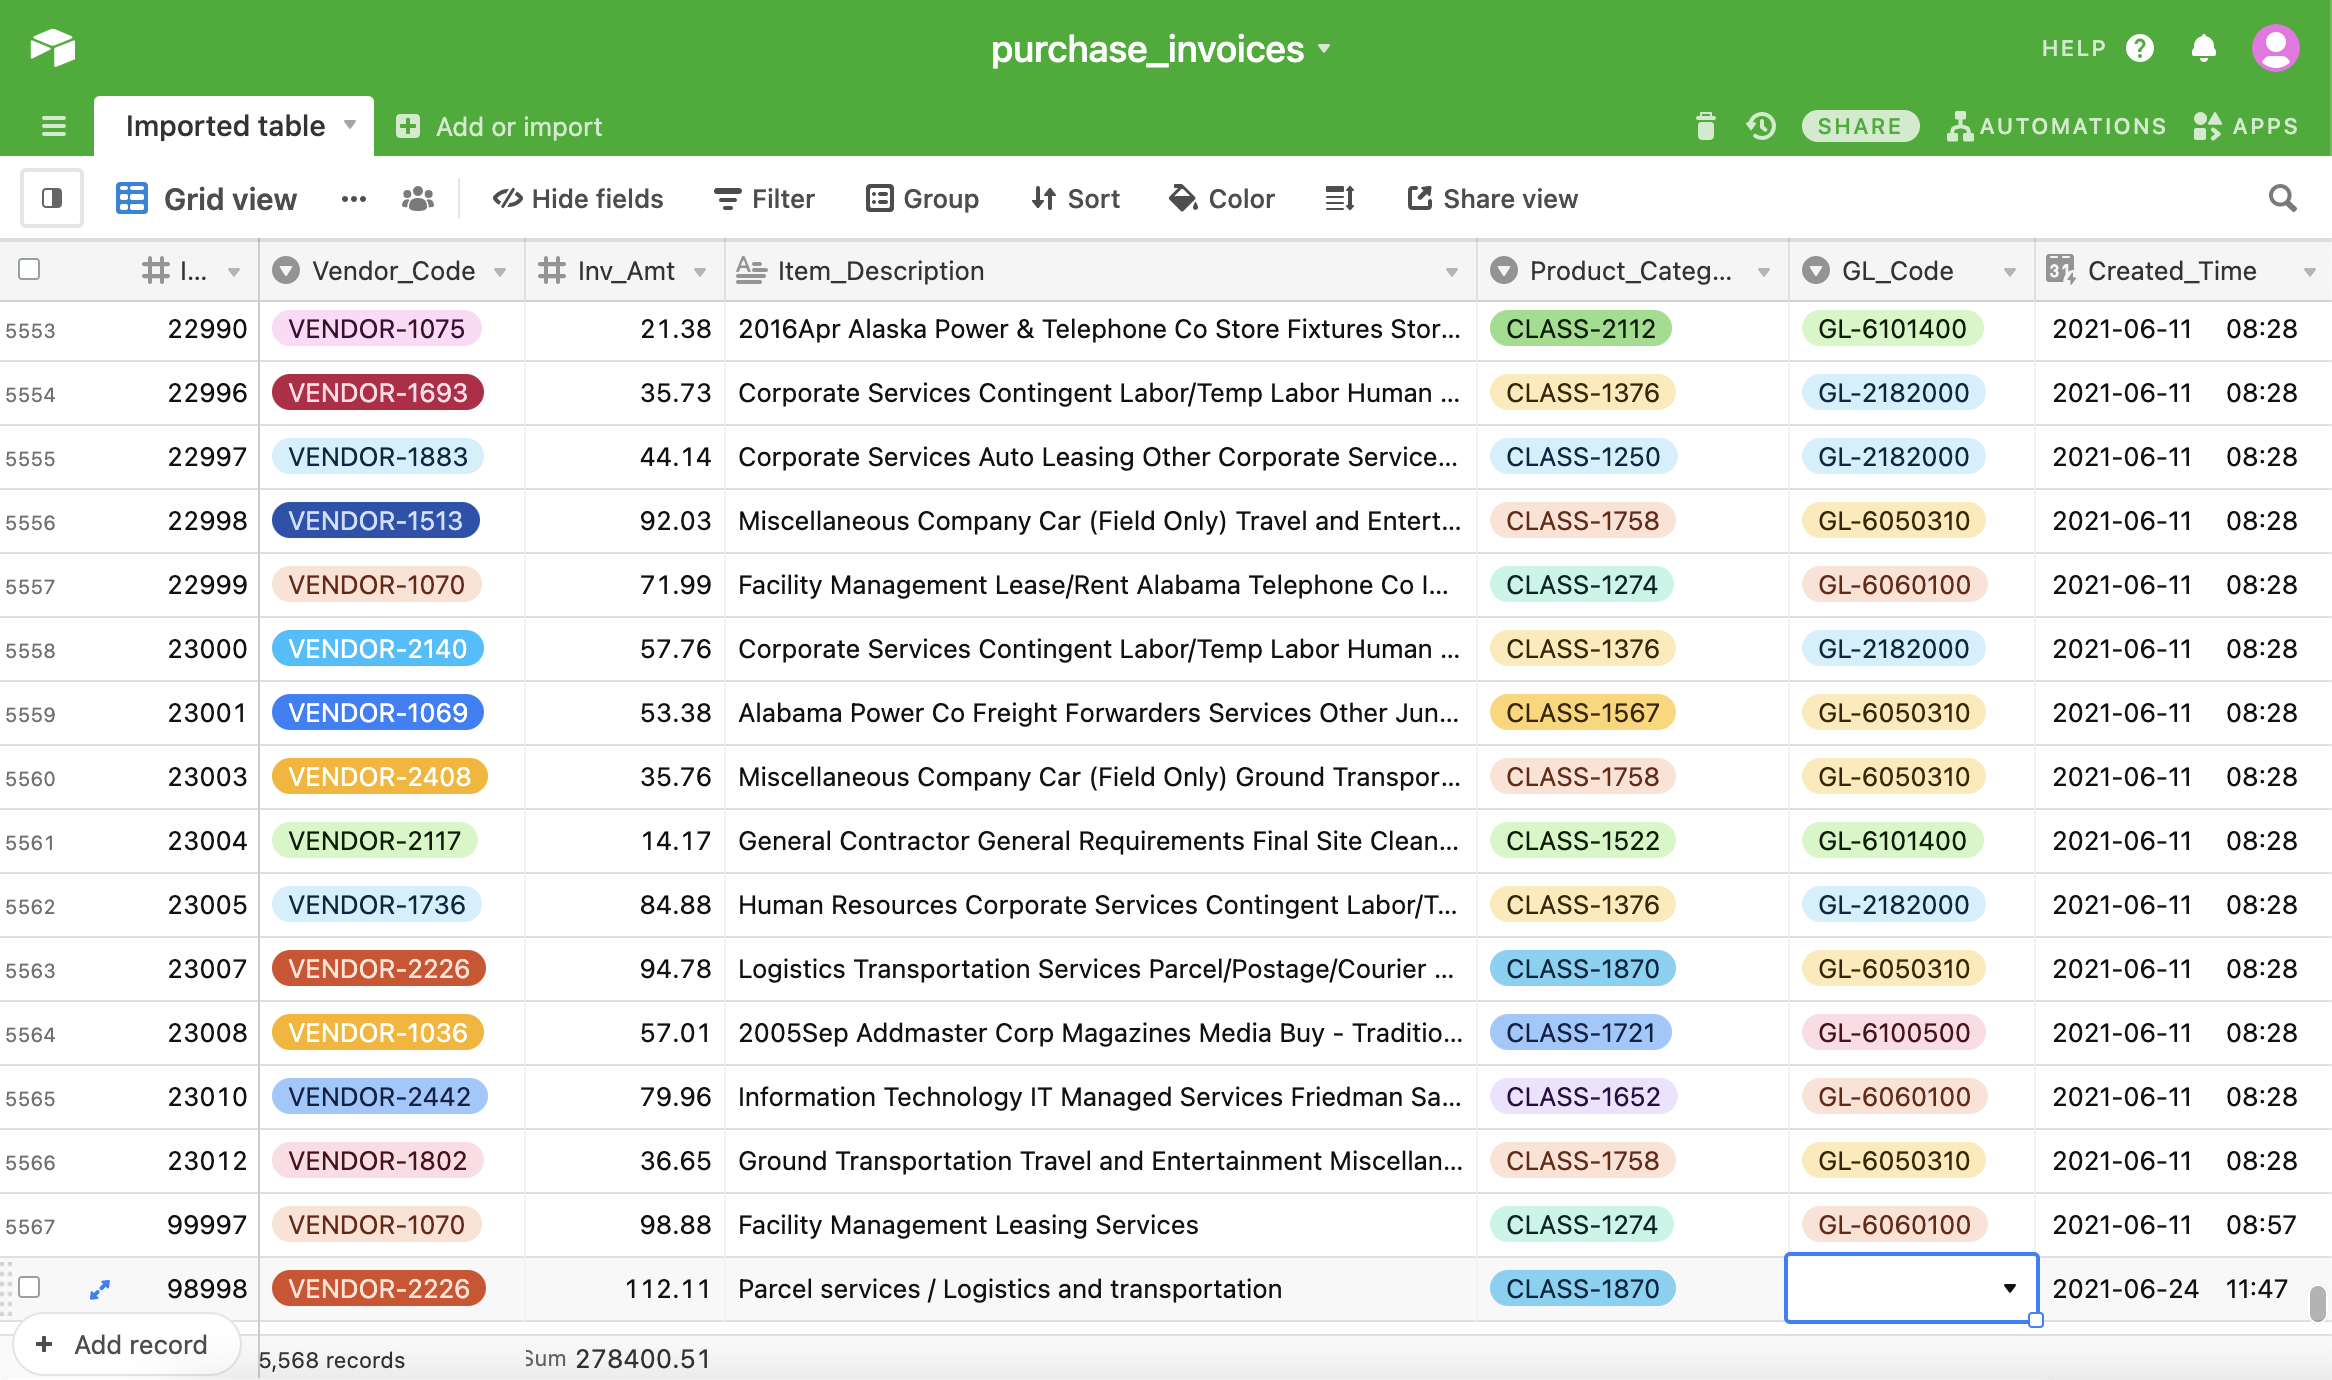
- You have an Airtable base that has a table for purchase invoices. A row represents each invoice.
- One of the fields is
GL_Code, which identifies the general ledger code of each invoice - so how are they accounted for. - As you receive new invoices, some other automation or piece of code reads them and fill the details as a new row in this Airtable, but without the
GL_Code. You do that manually for each invoice. - Now you want Aito to fill in the
GL_Codeautomatically.
As Aito acts like a database in the cloud and uses the dataset for automatically learning, we need to consider two things.
- Getting the historical data from Airtable to Aito
- Using Aito to make predictions for the new incoming rows
Before we jump into actual steps, there is one thing to add. We add one more column in our Airtable, which is called Confidence. This field will contain each predicted GL_Code confidence to see the rows that need a review quickly. I filled in max confidence of 1.00 to all the historical records, but this is not necessary.
Historical data from Airtable to Aito
While there are multiple ways to set up the data transfer from Airtable to Aito, we take a bit of a shortcut in this blog. We do the data transfer once, using Aito Console UI for the purpose.
The easiest way is to download the existing table as a CSV from Airtable, upload it to Aito, and let the user interface guide you through a dataset creation.
If we implement this for production purposes, we would naturally need another automation that schedules the insert of the new historical records to Aito, for example, daily, weekly or monthly. There are numerous ways to do it, but I will spare that for another blog post. Check our documentation for tips.
Aito predictions using Integromat
We need a piece of glue here, and I chose to use Integromat. It has ready integrations both with Airtable and APIs that we need to get Aito bits in.
The picture below shows the high-level view of my automation. It watches for the new rows in my Airtable periodically and then sends a call to Aito to get predictions for the missing GL_Code and update the rows with new data.
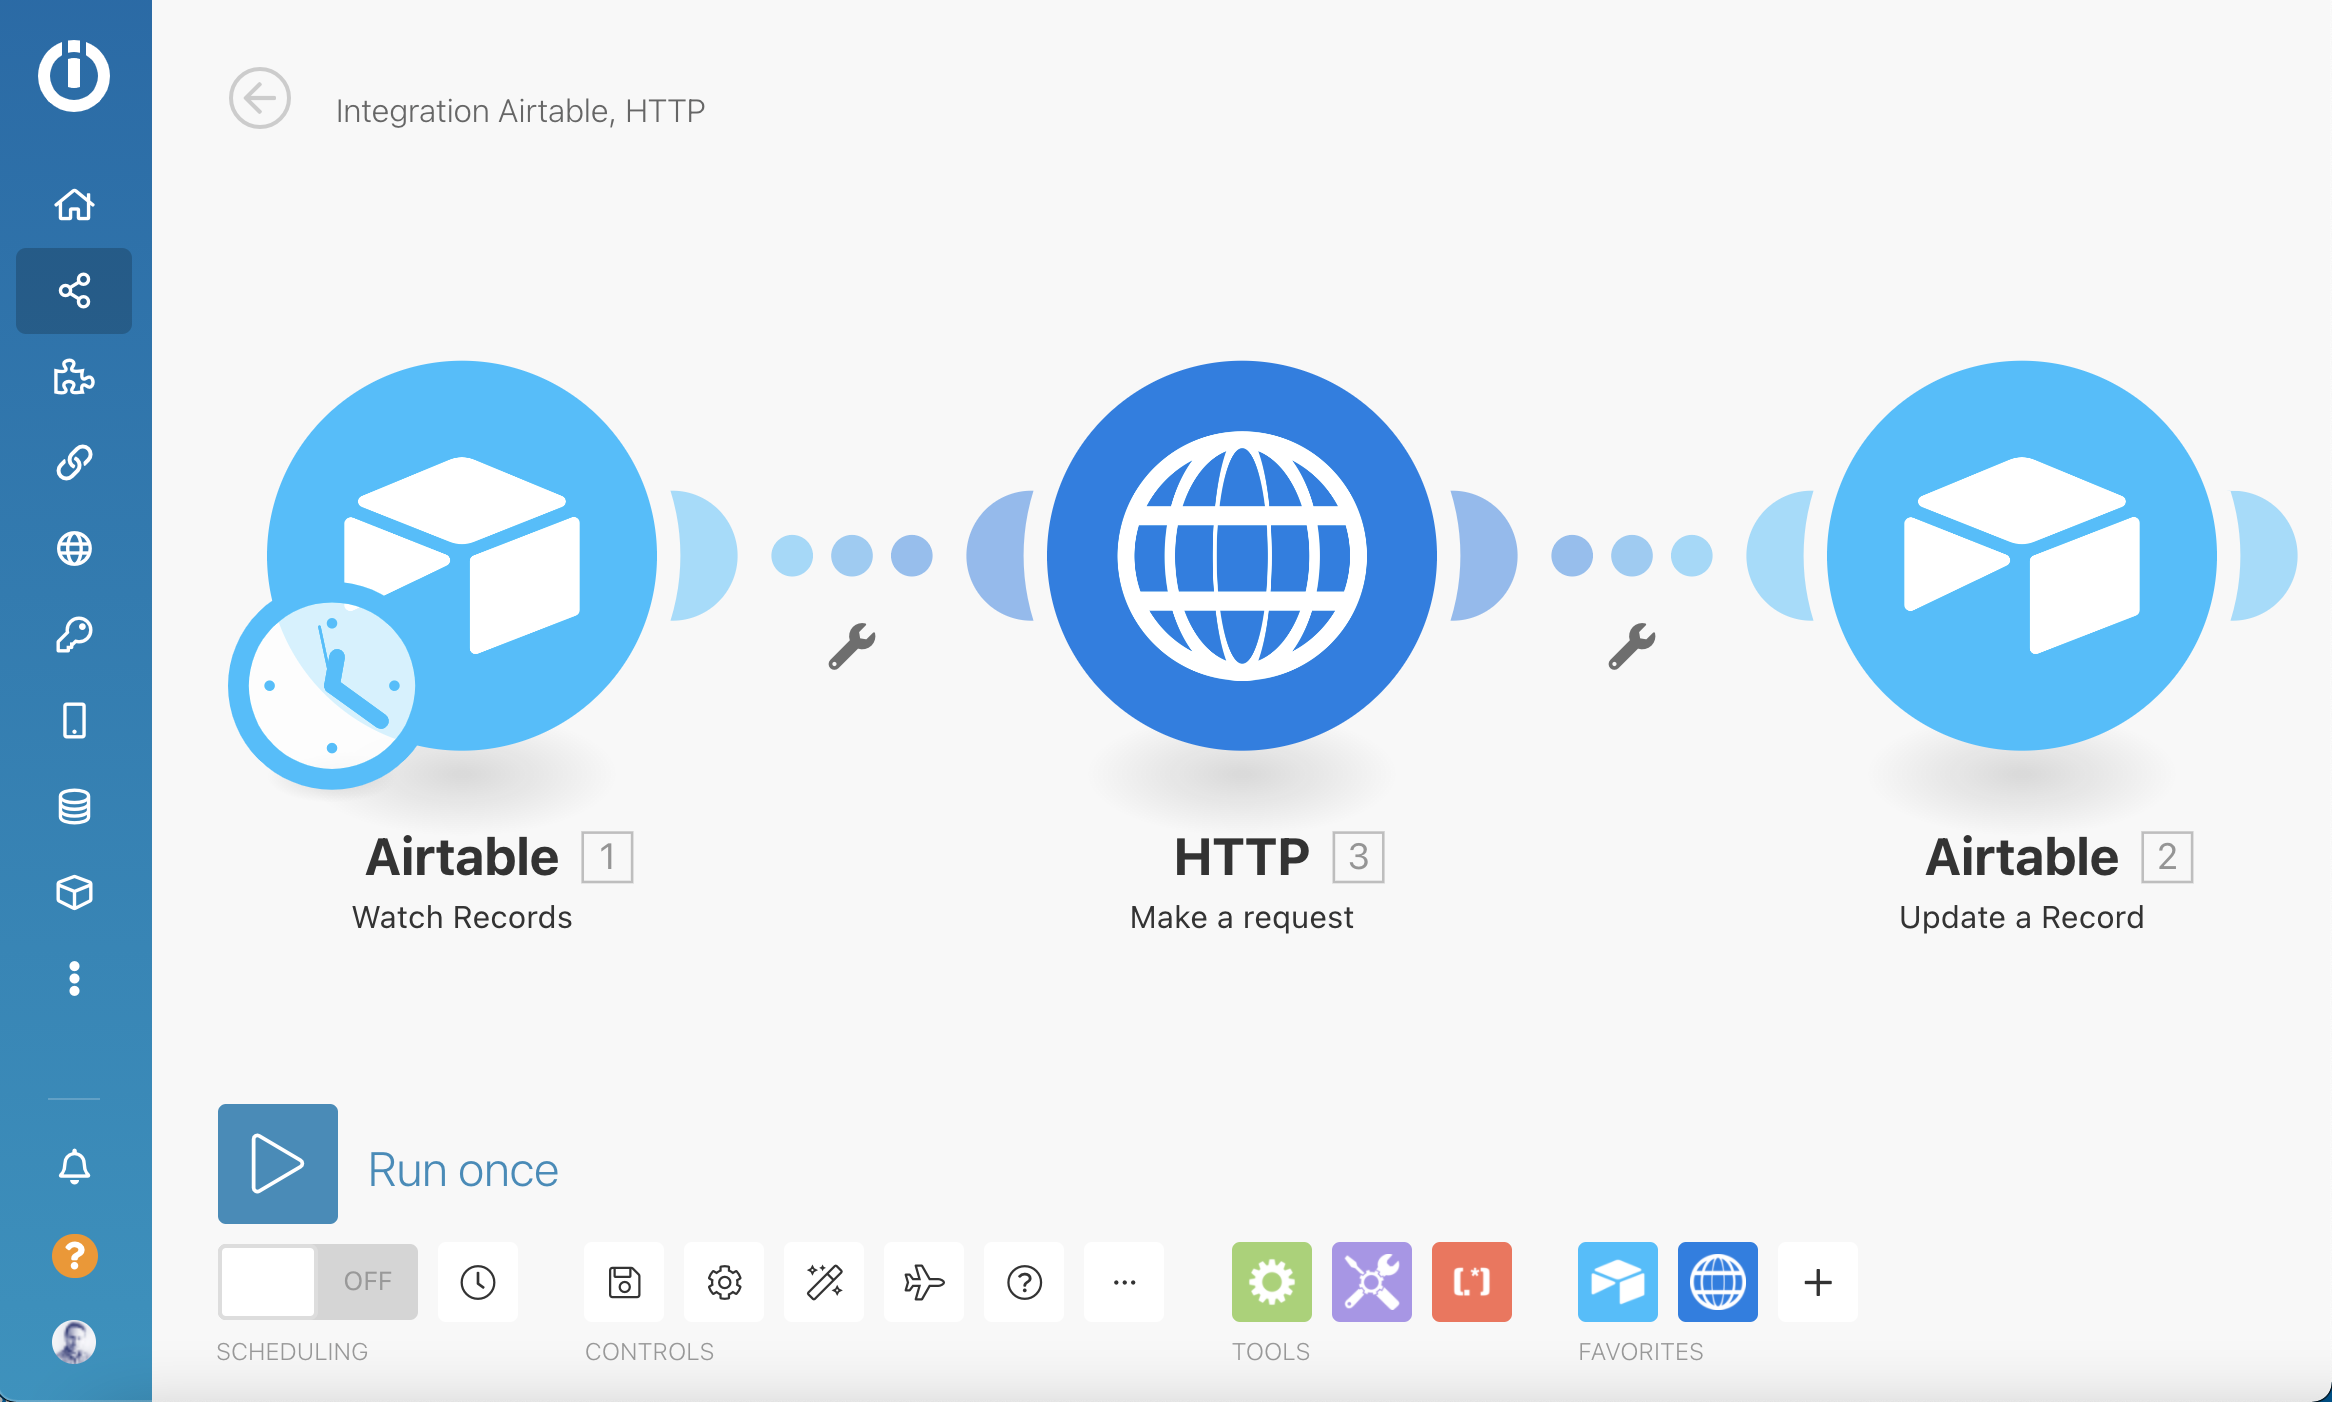
Let's review each step at a time.
Watch Airtable for the new rows
This configuration is quite simple. Just connect your Airtable using the API token you find in your profile in the Airtable, and choose the right base and table. I'm using the Created_Time field as trigger field (Integromat uses this to determine if something is new or not) and Inv_Id as Label field - the one that uniquely identifies each row.
I am using a free version of Integromat for the demo; thus, I am limited to 15mins intervals for watching for the new rows.
API call to Aito to get the GL_Code predictions
Next, we'll use the HTTP "Make a request" activity to connect Aito. This one takes each new row from the previous step and calls Aito API with the correct details. Let's get this configured right.
Request content is the trickiest one. The query uses Aito language, but I have a tip for you! You can use a copy-pasted query from Aito Console as a baseline and make a few edits. Head over to the "Test Predictions" tab within your instance details in Aito. Follow the video, and you'll do it in no time.
Choose your table and prediction target and reveal the JSON code used to make the predictions. Copy it, and paste it to the request content field in Integromat. Then, important, you need to replace the static content of the rows with the proper tags.
Finally, make sure to check the "Parse response" box, as that allows you to use Aito's results more manageable.
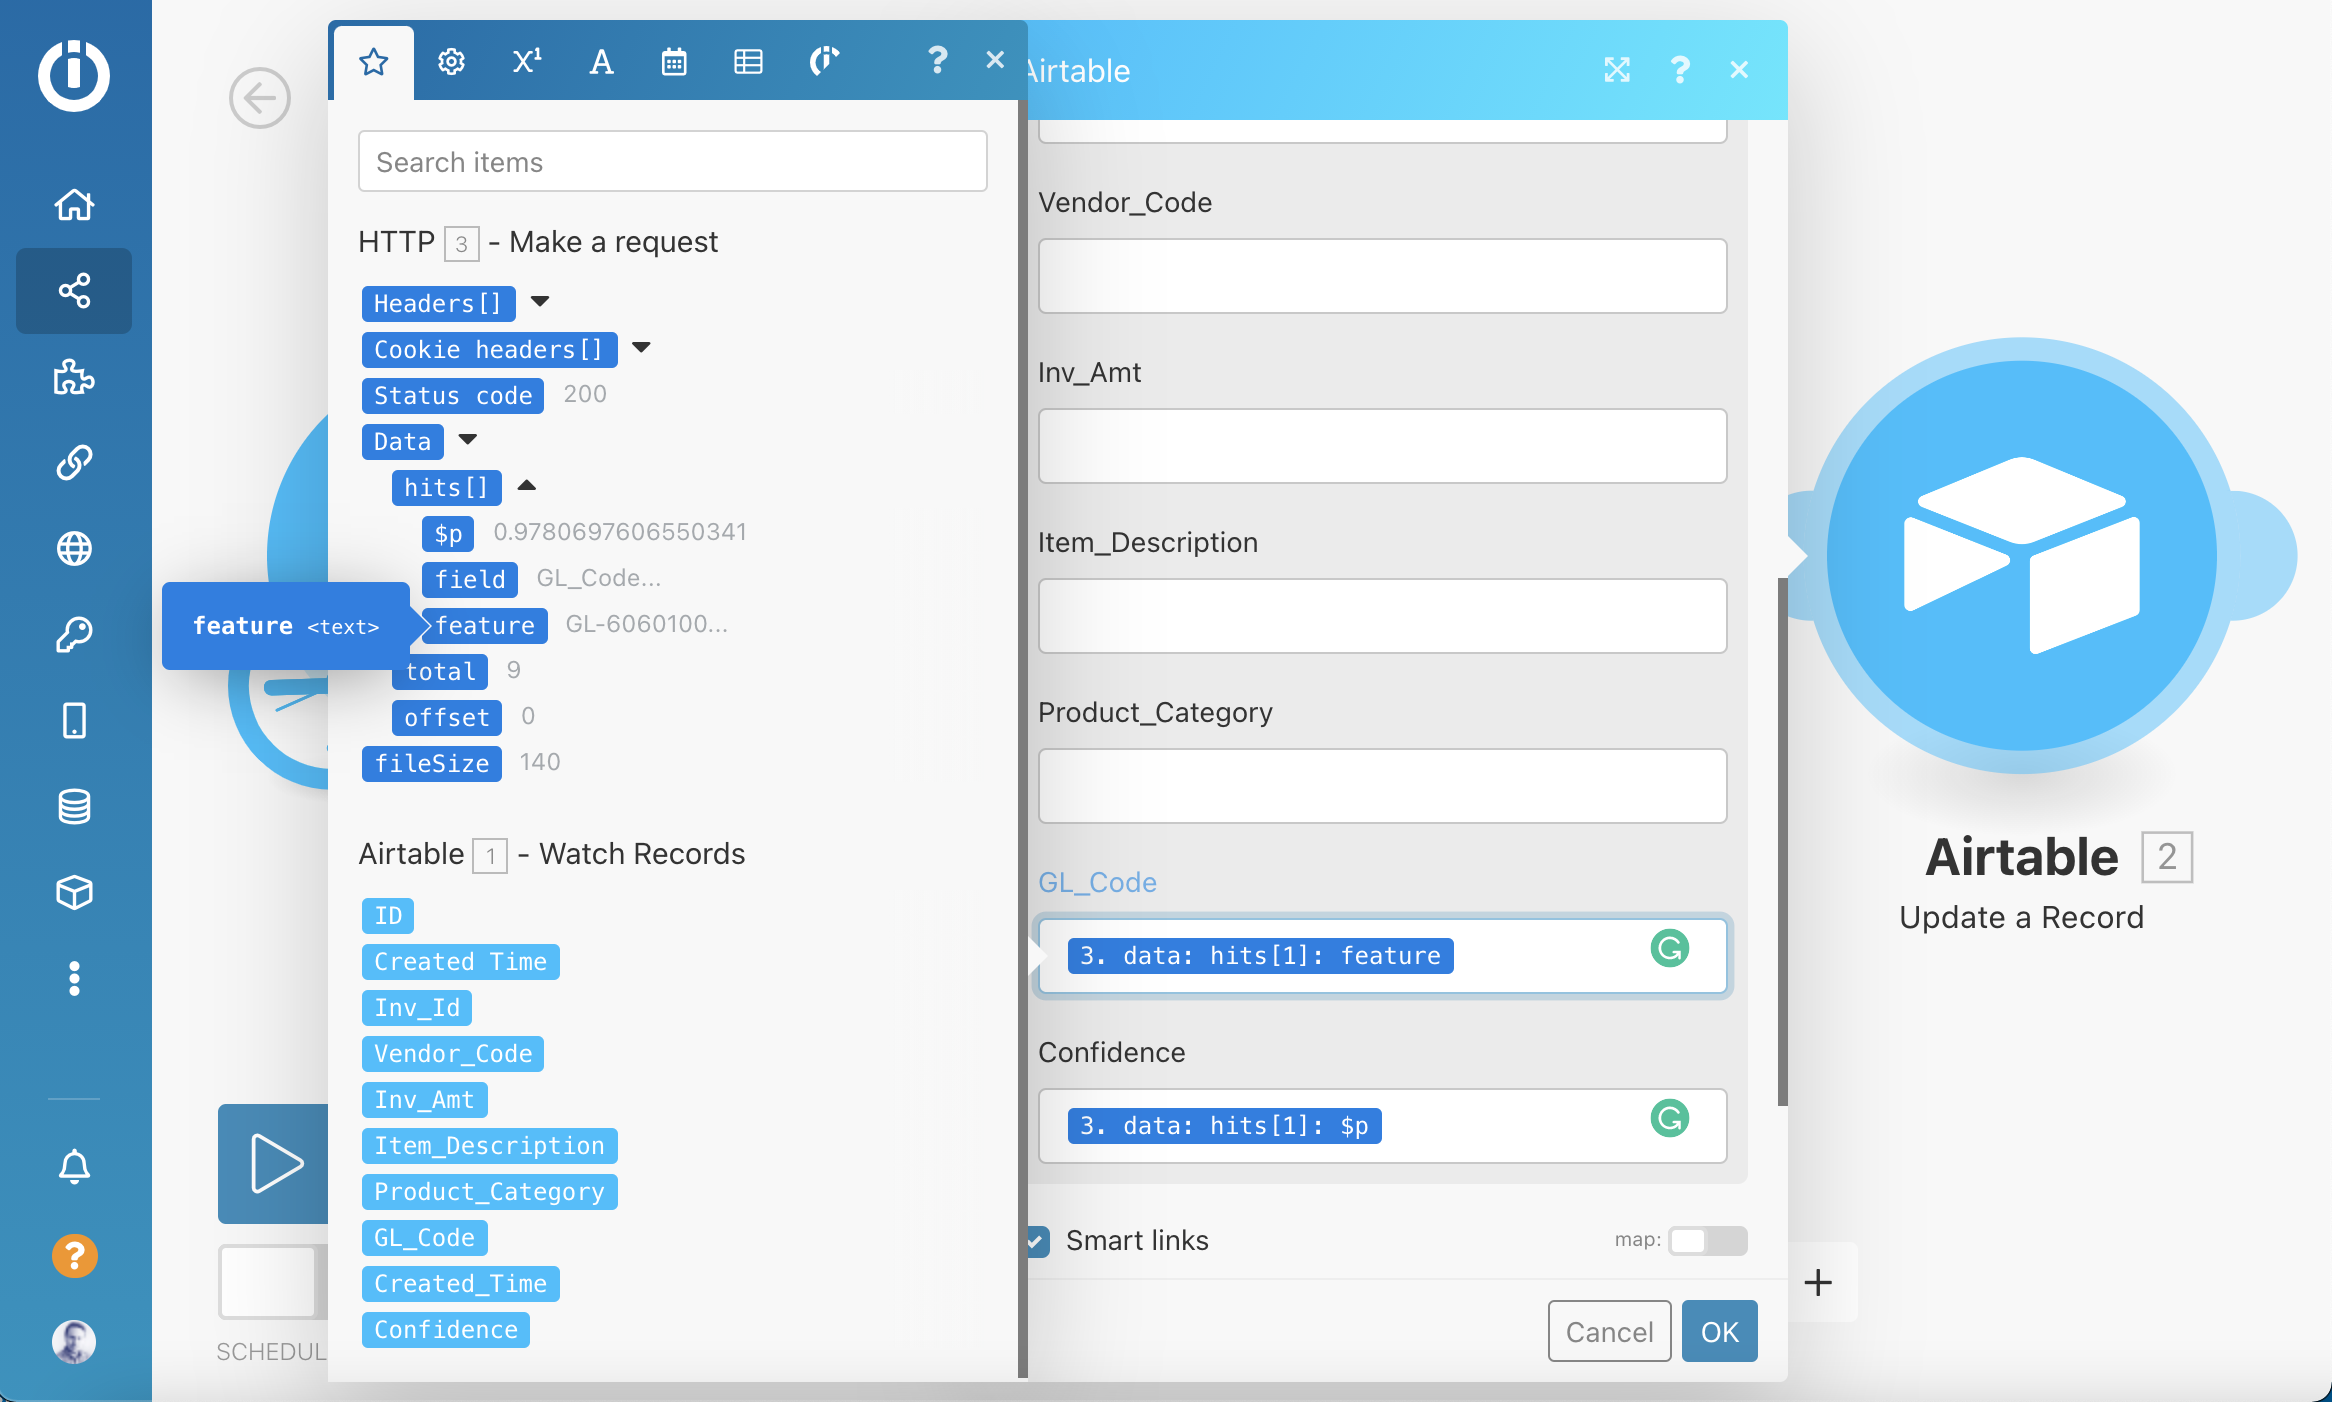
Update Airtable rows
The last action, called Update records, updates the details back to the respective rows in Airtable. Only fill in the fields that you want to write. You'll find the correct fields from inside the Aito response under data, hits and then you'll choose feature (that is the predicted GL_Code in our case) and $p that represents the Confidence. Also remember to set you ID record as the Record, so that the updates go to the right rows.
Pulling it all together
All ready! You can test the predictions by entering data manually and hitting "Run" in Integromat. If things work, you are good to go and set your automation to run scheduled! Check my screen recording below for the result. Pretty impressive for about 10 minutes of work!
I even did the trick and left one Product_Category empty to show that the predictions function with imperfect inputs. ;)
Comments are welcome, and you'll find me easiest at Aito slack channel.
Back to blog listAddress
Aito Intelligence Oy
c/o Innovation Home
Toinen Linja 14
00530 Helsinki
Finland
VAT ID FI28756352
Contact
COVID-19 has driven us all to work remote, please connect with us online. Stay safe & play with data!
Follow us